
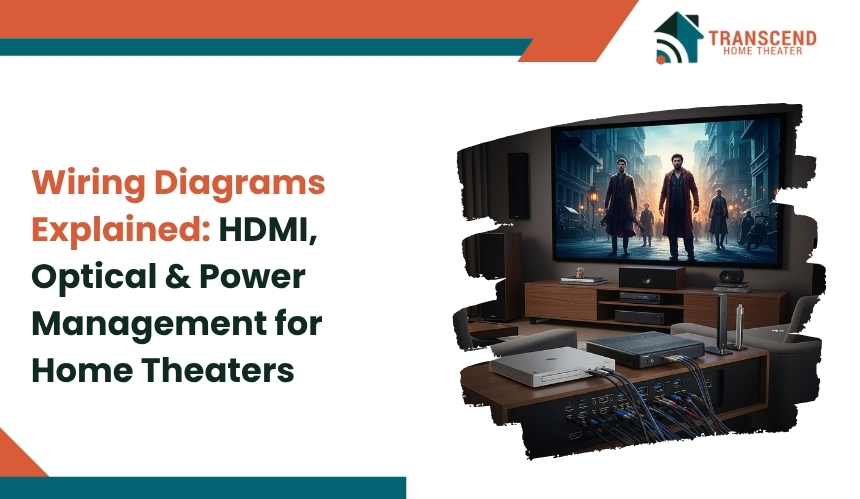
Wiring Diagrams Explained: HDMI, Optical & Power Management for Home Theaters
When setting up a home theater system, one of the most critical components to understand is the wiring diagram. Wiring diagrams help you visualize how various components of your system, such as HDMI cables, optical connections, and power management setups, interconnect to ensure a smooth, efficient, and high-quality experience.
In this guide, we will break down the essential types of wiring diagrams you need to know for your home theater. We will focus on the three key areas: HDMI connections, optical audio wiring, and power management systems.
What Are Wiring Diagrams and Why Are They Important for Home Theater Setup?
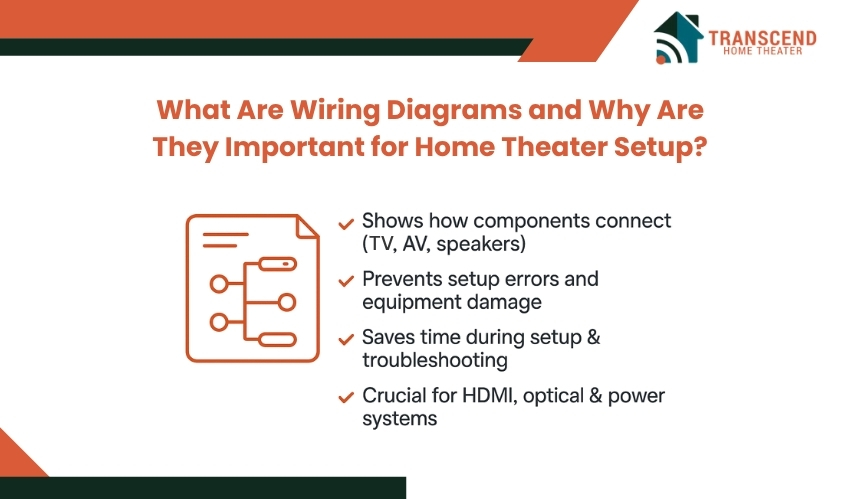
Wiring diagrams are detailed visual representations that show how various components in a home theater system are connected. They provide a roadmap for setting up your system efficiently and without error.
These diagrams typically illustrate how to link devices such as the TV, speakers, sound systems, receivers, and other multimedia equipment. Understanding how to read and use wiring diagrams is key to ensuring your home theater operates seamlessly.
If you’re unsure about interpreting these diagrams or making the right connections, working with a trusted home theater installer can ensure your setup is done correctly, saving you time and hassle while optimizing performance.
Why Do You Need a Wiring Diagram for Your Home Theater?
Wiring diagrams are especially important because they simplify complex setups. Whether you’re integrating an HDMI, optical, or power system, a wiring diagram offers a clear, step-by-step guide. Without this, it’s easy to misconnect or overlook essential connections, leading to poor performance or damage to equipment.
By following the diagram, you can avoid these pitfalls and ensure everything is wired correctly, helping you achieve the highest quality audio and video performance.
How Can Wiring Diagrams Improve Your Home Theater System?
For a home theater system to work optimally, correct wiring is essential. It ensures signals are transmitted properly, prevents signal loss, and helps to avoid unnecessary complications like poor sound or video output. A well-planned diagram not only saves time during installation but also serves as a helpful reference for future troubleshooting.
Understanding HDMI Wiring Diagrams: The Backbone of Home Theater Connectivity
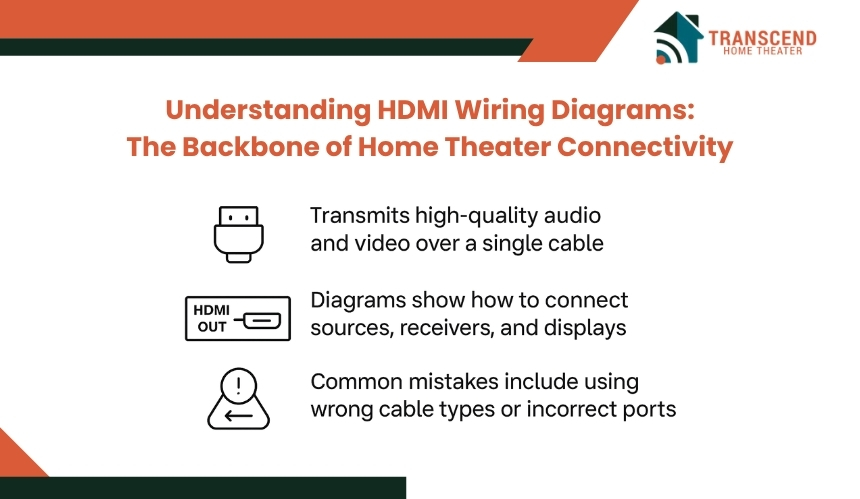
HDMI (High-Definition Multimedia Interface) is one of the most important components in modern home theater systems. It is the primary method for transmitting high-quality audio and video signals between devices. Whether you’re connecting your TV to an AV receiver, gaming console, or Blu-ray player, HDMI ensures seamless transfer of high-definition content.
What is HDMI and Its Role in Home Theater Systems?
HDMI is essential for transmitting both video and audio signals over a single cable. It supports high-definition video formats such as 4K and even 8K, along with advanced audio formats like Dolby TrueHD and DTS-HD Master Audio. This makes it the go-to choice for home theater enthusiasts who demand high-quality visuals and sound.
In a home theater setup, HDMI acts as the backbone that connects key components such as your television, soundbar, game consoles, and media players.
How Do You Read an HDMI Wiring Diagram?
Reading an HDMI wiring diagram is straightforward once you understand the basic components. The diagram typically includes labels for the HDMI ports on each device, along with lines indicating the cables connecting them. When interpreting an HDMI diagram, focus on the following key elements:
- Source devices: These are the components that send the signal, like your Blu-ray player or game console.
- Display devices: These are the devices that receive the signal, such as your TV or projector.
- AV receivers: These devices often act as a hub, receiving HDMI signals from source devices and routing them to display devices and audio systems.
The diagram will show how these devices interact, ensuring that you understand where each cable should be plugged in for optimal performance.
What Are the Common Mistakes to Avoid with HDMI Wiring?
Did you know? HDMI cables longer than 25 feet (7.6 meters) can experience signal degradation if not properly shielded, especially when running 4K or 8K content . |
Even with a diagram, mistakes can still happen. Here are a few common issues people encounter when setting up HDMI connections:
- Wrong cable types: Not all HDMI cables are the same. Some cables are designed to support high-bandwidth formats like 4K and 8K, while others are not. Make sure you’re using the appropriate cable for your setup.
- Incorrect ports: Many devices have multiple HDMI ports, some of which may be optimized for specific functions, such as HDMI ARC (Audio Return Channel) for sound systems. Ensure you’re connecting cables to the correct ports as specified in the wiring diagram.
- Cable length issues: HDMI cables have a maximum effective length, typically around 25 feet for standard cables. If you’re using a cable that’s too long, you may experience signal degradation. Use a signal booster or high-speed HDMI cable for longer distances.
Optical Wiring Diagrams: Ensuring Quality Audio for Your Home Theater
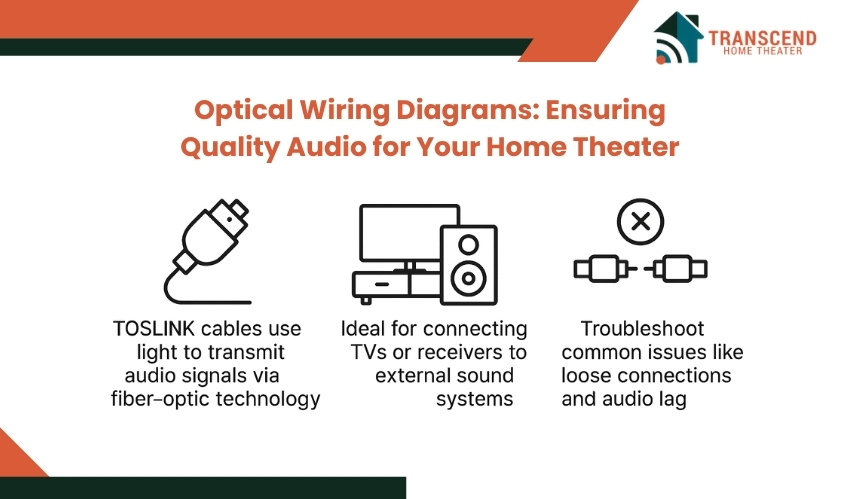
Optical wiring plays a crucial role in home theater systems by providing a high-quality method for transmitting digital audio. Often used to connect components like soundbars, AV receivers, and televisions, optical cables (also known as TOSLINK) offer a significant advantage by delivering clear, interference-free audio signals.
Unlike HDMI, which carries both audio and video signals, optical cables are dedicated to audio, making them ideal for high-fidelity sound systems.
What is Optical Audio Transmission and How Does It Work?
Optical audio transmission uses light signals to carry digital audio between devices. The signal is transmitted through a fiber-optic cable, which is immune to electromagnetic interference, providing a cleaner, more reliable audio experience.
This makes optical wiring ideal for transmitting high-quality audio from your TV to a sound system, or connecting an AV receiver to external speakers. While HDMI can handle both video and audio, optical wiring is often used when you want to focus solely on delivering premium sound.
How to Set Up Optical Wiring in Your Home Theater System?
Setting up optical wiring involves a few simple steps to ensure clear and crisp audio. Here’s a general guide:
- Step 1: Identify the optical input and output ports: Check your TV, soundbar, or receiver for an optical port, often labeled as “TOSLINK” or “Optical In/Out.”
- Step 2: Connect the optical cable: Insert one end of the optical cable into the optical out port of your TV or source device and the other end into the optical in port of your sound system or receiver.
- Step 3: Select the appropriate audio output settings: In your device’s audio settings, ensure that the optical audio output is selected. Many devices will default to HDMI audio, so this step is crucial for proper audio routing.
- Step 4: Test the setup: Play audio through your system and ensure that sound is clear and without distortion. Adjust the settings if necessary.
What Are the Common Problems with Optical Wiring and How Do You Fix Them?
While optical audio systems are generally reliable, they are not immune to issues. Here are some common problems and how to troubleshoot them:
- No Sound or Audio Dropouts: This issue may arise if the optical cable is not securely connected. Ensure that the cable is fully inserted into the ports, and check for any visible damage to the cable. A loose connection is the most frequent cause of signal loss.
- Audio Delay: Optical connections may sometimes cause audio to lag behind video, especially when using external speakers or soundbars. Check the audio settings on your devices for options to sync the sound to the video, or try using an audio processor or receiver that can adjust the timing.
- Poor Audio Quality: If you’re experiencing muffled or distorted sound, verify that your devices support the audio formats being transmitted. Optical cables typically support stereo and Dolby Digital audio formats but may not be suitable for higher-end formats like Dolby Atmos, which require HDMI for transmission.
Power Management in Home Theater Systems: Ensuring Safe and Efficient Operation
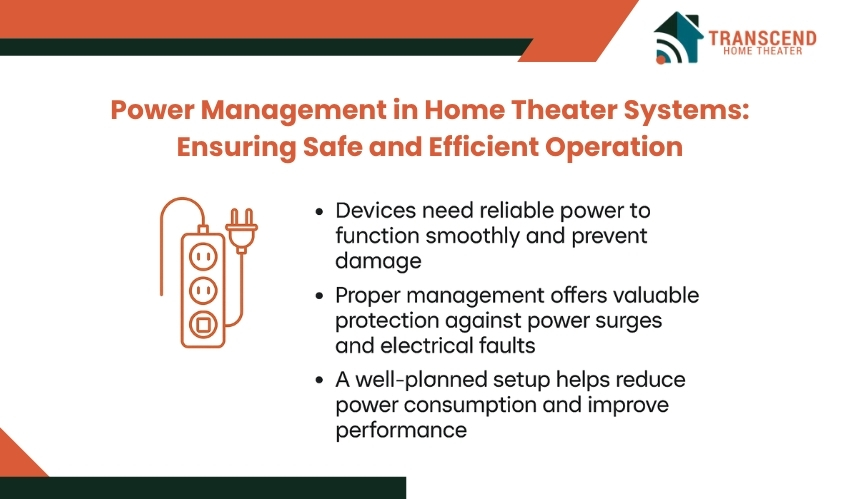
Power management is a crucial yet often overlooked aspect of setting up a home theater system. A reliable power supply ensures that all your devices function smoothly, and it also protects them from power surges, overloads, and electrical malfunctions.
Why Is Power Management Important in Home Theater Systems?
A home theater system typically includes several devices that require power, often drawing different amounts of electricity. Improper power distribution or lack of protection can lead to device failure, electrical fires, or damage to sensitive electronics.
For example, using standard household outlets without surge protectors or power strips could put your equipment at risk during a power surge.
By using a dedicated power management system, you ensure that your devices get the appropriate voltage and are protected from power surges or spikes. Additionally, a well-planned power setup can help reduce energy consumption and make your system more efficient.
How Do You Set Up Power Wiring for Your Home Theater System?
Setting up a home theater wiring system can feel overwhelming, but with a structured approach, you can ensure your system functions perfectly. Follow this step-by-step guide to wire your home theater system, combining HDMI, optical, and power wiring for a seamless experience.
Step 1: Plan Your Setup and Gather the Necessary Cables
Before diving into the actual wiring, take time to plan the layout of your home theater system:
- Identify all the devices you’ll be connecting, such as your TV, AV receiver, sound system, gaming consoles, and Blu-ray players.
- Ensure you have the right cables for HDMI, optical audio, and power connections. Make sure to use high-speed HDMI cables for 4K or 8K setups, and optical cables for any audio-only connections.
Step 2: Set Up the HDMI Connections for Video and Audio
- Connect Source Devices to the AV Receiver/TV: Start by connecting your primary source devices (e.g., gaming consoles, Blu-ray players, or streaming devices) to your TV or AV receiver using HDMI cables. HDMI will carry both the video and audio signals from these devices.
- Connect the AV Receiver to the TV: If you are using an AV receiver, connect the HDMI output from the receiver to the TV’s HDMI input. This allows your receiver to handle the video signal and send it to the TV.
Step 3: Connect Audio Using Optical Cables (If Needed)
If your sound system or soundbar does not support HDMI audio, use an optical cable to connect the audio:
- Connect the TV or AV Receiver to the Sound System: Use the optical input on the soundbar or AV receiver and plug the other end into the optical output on your TV or receiver.
- Adjust Audio Settings: Go to the audio settings on your TV or receiver and select the optical audio output to ensure the system receives the correct signal.
Step 4: Manage Power Connections and Protect Your Equipment
- Connect Your Devices to a Power Strip or Surge Protector: Plug all your home theater devices into a reliable surge protector or power strip to safeguard them from electrical surges and ensure stable power.
- Power On Devices: Turn on your devices in the following order: TV, receiver, and then the other source devices (Blu-ray player, game consoles, etc.). This ensures proper power sequencing.
- Use a UPS for Sensitive Devices: For high-power components like projectors or amplifiers, consider using an Uninterruptible Power Supply (UPS) to prevent power outages or interruptions.
Step 5: Test the System and Make Adjustments
- Check Video Output: Ensure the HDMI connection is providing the expected video quality. If you’re using 4K or 8K devices, verify that the HDMI cable supports the necessary bandwidth.
- Check Audio: Play sound through your system to ensure that the optical cable is transmitting the audio correctly. If there’s an audio delay or issue, adjust the settings on your sound system or use a sync feature.
- Fine-Tune Power Settings: Monitor the power load to avoid overloading the surge protector, and ensure all components are working smoothly.
Step 6: Organize and Clean Up the Wiring
Once all the connections are made, organize the cables to prevent tangling:
- Use cable management tools like clips or sleeves to keep cables neatly arranged and out of sight.
- Label your cables so you can easily identify each connection for troubleshooting purposes in the future.
Final Check: Test Your Home Theater System
- Video and Audio Sync: Ensure that both video and audio are working without glitches.
- Device Settings: Go through the settings of each device to make sure they are properly configured for optimal performance.
Power management is not just about protecting devices from electrical damage. It is also about ensuring the best possible performance. Clean, stable power delivery ensures that your home theater runs without glitches like flickering screens or audio distortions.
What Are the Best Practices for Power Management in Home Theaters?
To get the most out of your home theater system and ensure its longevity, consider these best practices:
- Use a UPS (Uninterruptible Power Supply): A UPS is a great investment to ensure that your devices stay powered during short outages and provide time to shut down equipment properly, preventing data loss or hardware damage.
- Keep power cables organized: Use cable management tools to prevent power cables from tangling or becoming a fire hazard. It also helps to keep cables away from heat sources like radiators or vents.
- Invest in quality surge protectors: Opt for surge protectors designed for home theater systems, which can handle the power demands of modern electronics. These should offer protection against both surges and spikes.
- Monitor power consumption: Some power strips and surge protectors come with built-in monitoring tools that track energy usage, helping you spot any potential issues early.
How Do HDMI, Optical, and Power Wiring Work Together?
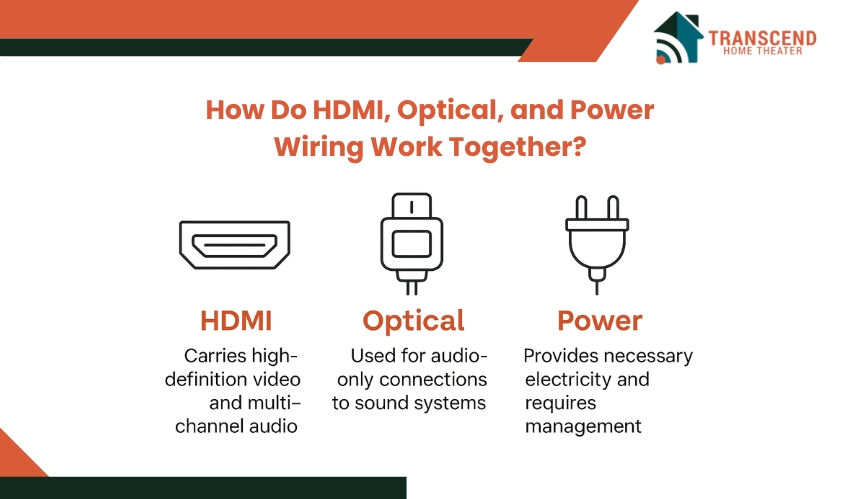
Each of these wiring components plays a specific role, and when they are combined properly, they enhance the overall performance of your system:
- HDMI handles high-definition video and multi-channel audio, ensuring crisp visuals and rich sound.
- Optical wiring is used for audio-only connections, typically linking a sound system or soundbar to the TV or receiver. It is ideal for high-fidelity sound transmission, especially in systems without HDMI support for audio.
- Power ensures that each device receives the necessary electricity to operate, and power management systems like surge protectors or UPS devices safeguard against electrical issues.
When combined, these wiring types allow for a balanced, efficient home theater setup. For example, while HDMI can carry the video and some audio signals, optical cables may handle additional or specialized audio signals, and power wiring ensures that everything has a reliable source of electricity.
Fact: As of 2022, approximately 72% of home theater systems in the U.S. are multi-device setups that require complex wiring configurations, including HDMI, optical, and audio cables . |
Around 40% of home theater users report experiencing audio and video syncing issues, often caused by incorrect wiring or mismatched equipment. If you are ready to set up the ultimate home theater experience, Let Transcend Home Theater help you create the perfect entertainment space with expert installation and top-quality wiring solutions.
Frequently Asked Questions
Can I use any HDMI cable for 4K content?
No, not all HDMI cables are suitable for 4K content. You should use High-Speed HDMI cables that support the necessary bandwidth for 4K video and high-definition audio. For 8K content, make sure to choose cables that meet the HDMI 2.1 standards.
How do I know which devices need an optical connection?
Devices like soundbars and older AV receivers that do not support HDMI audio may require optical cables for transmitting audio. If you’re unsure, refer to the user manuals of your sound system or TV to determine if an optical connection is necessary.
Do I need a surge protector for my home theater system?
Yes, using a surge protector is highly recommended for your home theater equipment. It protects your devices from power surges caused by lightning strikes, electrical outages, or power spikes, preventing potential damage to expensive electronics.
Can I connect multiple devices to the same HDMI port?
No, each HDMI port on your TV or AV receiver is designed to connect to a single device. However, you can use an HDMI switch or AV receiver with multiple HDMI inputs to connect and switch between several devices using a single HDMI port.
What should I do if my audio and video are out of sync in my home theater?
Audio and video sync issues can be caused by improper wiring or settings. To resolve this, check the audio output settings on your TV or receiver and ensure that the HDMI or optical cables are connected securely. Some devices also offer audio sync settings to help align sound and video.